
Table of contents
- Before You Start
- How to Download Proton VPN for Windows
- How to Install Proton VPN on Windows
- How to Sign In to Proton VPN
- Do not use manual VPN credentials in the Windows app
- If you do not have an account yet
- How to Connect to a Proton VPN Server
- Which connection option should you choose?
- How to Verify Proton VPN Is Working on Windows
- Check the app status
- Check your public IP address
- Check for DNS leaks
- Confirm apps use the VPN connection
- Common Proton VPN Windows Setup Mistakes
- Basic Troubleshooting Tips
- Try another VPN protocol
- Restart in the right order
- Check restrictive networks
- Useful Settings After Setup
- Final Setup Checklist
- FAQ
- How do I install Proton VPN on Windows?
- Do I need a Proton Account to use Proton VPN on Windows?
- How do I know Proton VPN is working on Windows?
- Why is Proton VPN not connecting on Windows?
- Can I choose a specific Proton VPN server on Windows?
To set up Proton VPN Windows, download the official Windows app from Proton VPN, run the installer, sign in with your Proton Account, connect with Quick Connect or choose a server manually, then verify that your public IP address and DNS traffic have changed. For most people, the setup takes only a few minutes, but using the correct installer and account credentials matters.
Before You Start
A smooth VPN setup on Windows depends on a few simple checks. Proton VPN works best when Windows is updated, your internet connection is stable, and no other VPN app is already controlling the network connection.
- Use the official Proton VPN Windows app, not a third-party download mirror.
- Make sure you have a Proton Account. The Windows app uses your Proton Account login.
- Temporarily close other VPN apps, proxy tools, or network filter apps during setup.
- Allow Windows User Account Control prompts when installing the app.
- If your antivirus asks about Proton VPN network components, allow them unless you have a specific security reason not to.
How to Download Proton VPN for Windows
The safest way to install Proton VPN is to download the Windows installer directly from Proton VPN. Avoid search ads, software bundle sites, and file-sharing pages, because VPN installers handle sensitive network traffic and should come from the official source only.
- Open your browser on your Windows PC.
- Go to the official Proton VPN website.
- Choose the download option for Windows.
- Save the installer file to a location you can find easily, such as Downloads.
- If your browser warns that the file is uncommon only because it is new, confirm that it came from Proton before opening it.
Tip: If you already have a Proton Account, you may also be able to download the app after signing in to your Proton dashboard. The important point is to use Proton’s own download source.
How to Install Proton VPN on Windows
After the installer finishes downloading, the installation process is straightforward. Proton VPN may install network drivers or adapters so it can create an encrypted VPN tunnel. Windows may ask for permission during this step.
- Open the downloaded Proton VPN installer file.
- Select Yes if Windows asks whether you want to allow the app to make changes.
- Follow the setup prompts shown by the installer.
- Keep the default installation location unless you have a specific reason to change it.
- Wait for the installation to finish.
- Launch Proton VPN when the installer offers to open the app.
If the installer does not open, right-click it and choose Run as administrator. If that still fails, restart Windows, download a fresh copy from Proton, and try again.
How to Sign In to Proton VPN
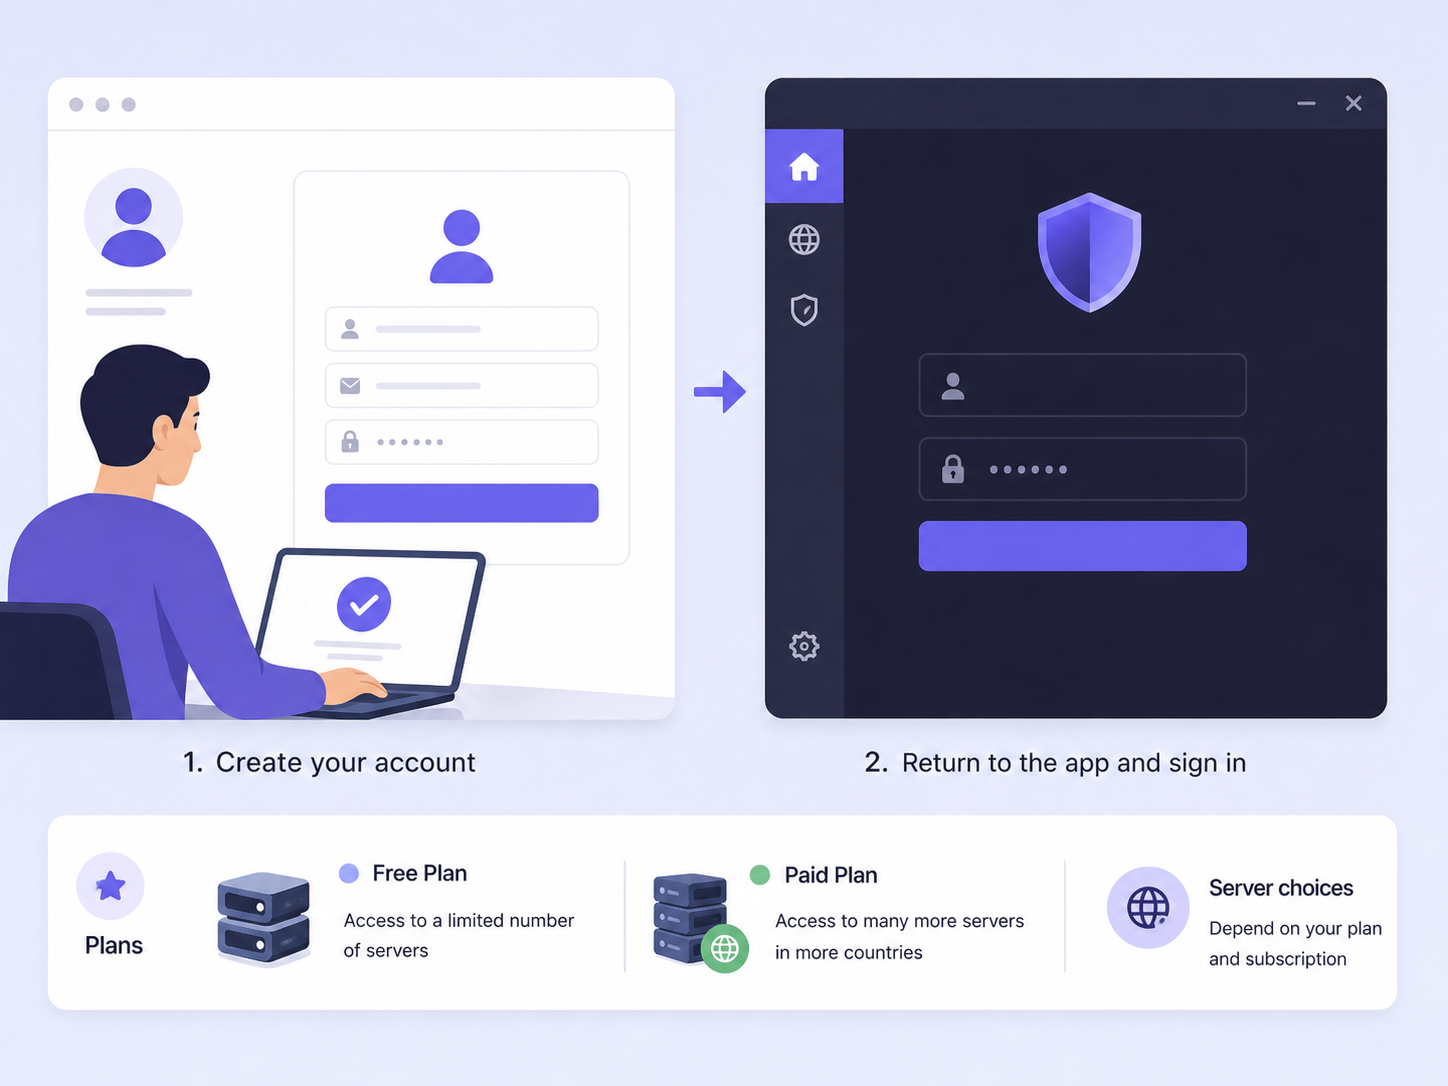
When the Proton VPN Windows app opens, sign in using your Proton Account email or username and password. This is the same account used for Proton services. If you enabled two-factor authentication, enter the verification code when prompted.
Do not use manual VPN credentials in the Windows app
One common mistake is trying to sign in to the Windows app with manual OpenVPN or IKEv2 credentials. Those credentials are used for manual configurations, not for the official Proton VPN app. For the Windows app, use your normal Proton Account login.
If you do not have an account yet
Create a Proton Account first, then return to the Windows app and sign in. Proton VPN offers both free and paid plans, and the available server choices depend on your plan.
How to Connect to a Proton VPN Server
Once you are signed in, the fastest option is Quick Connect. It automatically chooses a suitable server based on availability and performance. If you need a specific country, open the server list and select the location you want.
- Open the Proton VPN Windows app.
- Click Quick Connect for an automatic connection.
- To choose manually, select a country from the server list.
- If server details are shown, pick a server with a lower load for better speed.
- Wait until the app shows that the VPN is connected.
Which connection option should you choose?
| Option | Best for | What to expect |
|---|---|---|
| Quick Connect | Most everyday use | The app selects a practical server automatically. |
| Country selection | Accessing a specific region | Your IP address appears to come from that country. |
| Specific server | More control over speed or location | You can choose a server based on load or availability. |
| Secure Core, if available on your plan | Extra privacy routing | Traffic is routed through hardened Proton infrastructure before exiting. |
For normal browsing, Quick Connect is usually the simplest choice. If speed feels slow, try a nearby country or a server with lower load.
How to Verify Proton VPN Is Working on Windows
Do not rely only on the Windows Wi-Fi or Ethernet icon. That icon can show that you are online, but it does not prove the VPN tunnel is protecting your traffic. Use a few quick checks instead.
Check the app status
The Proton VPN app should show a connected status, the server location, and connection details. If it still says disconnected or connecting for a long time, the tunnel is not active yet.
Check your public IP address
Before connecting, search for your public IP address in a browser and note the country or approximate location. After connecting to Proton VPN, check again. The IP address should change, and the location should match the VPN server region rather than your real network location.
Check for DNS leaks
A basic DNS leak check should show DNS servers associated with the VPN connection rather than your internet provider. If your provider still appears, reconnect the VPN, disable custom DNS or proxy settings, and restart the browser.
Confirm apps use the VPN connection
Open a browser or app that needs internet access after the VPN connects. If pages load normally and your public IP has changed, Proton VPN is working for regular traffic. If only one browser shows the old location, clear its cache, disable location permissions, or test in a private window.
Common Proton VPN Windows Setup Mistakes
Most setup problems come from small details rather than the VPN app itself. These are the mistakes I would check first when a Windows installation does not behave as expected.
- Downloading the installer from an unofficial site instead of Proton.
- Trying to sign in with manual VPN credentials instead of the Proton Account login.
- Blocking Proton VPN network drivers during installation.
- Running another VPN, proxy, or privacy tool at the same time.
- Ignoring a captive portal on hotel, school, airport, or office Wi-Fi before connecting.
- Choosing a faraway server and assuming the VPN is broken because speed drops.
- Expecting the Windows network icon to prove VPN protection without checking the public IP.
Basic Troubleshooting Tips
If Proton VPN does not install, sign in, connect, or verify correctly, work through the problem in order. Start with the simplest cause before changing advanced settings.
| Problem | Likely cause | What to try |
|---|---|---|
| Installer will not open | Permission issue, incomplete download, or security software block | Run as administrator, download a fresh installer from Proton, restart Windows, and check antivirus prompts. |
| Cannot sign in | Wrong credentials, two-factor code issue, or account problem | Use your Proton Account login, check the password, enter the current 2FA code, and make sure Windows time is correct. |
| VPN stays on connecting | Blocked protocol, unstable network, or another VPN conflict | Disconnect other VPN tools, try another server, switch protocol in the app settings, or restart your router. |
| Connection is slow | Distant server, high server load, or local network congestion | Choose a nearby server, use Quick Connect, try a lower-load server, and close heavy downloads. |
| IP or DNS still looks wrong | Browser cache, custom DNS, proxy settings, or failed tunnel | Reconnect Proton VPN, disable custom proxy settings, flush DNS, restart the browser, and test again. |
Try another VPN protocol
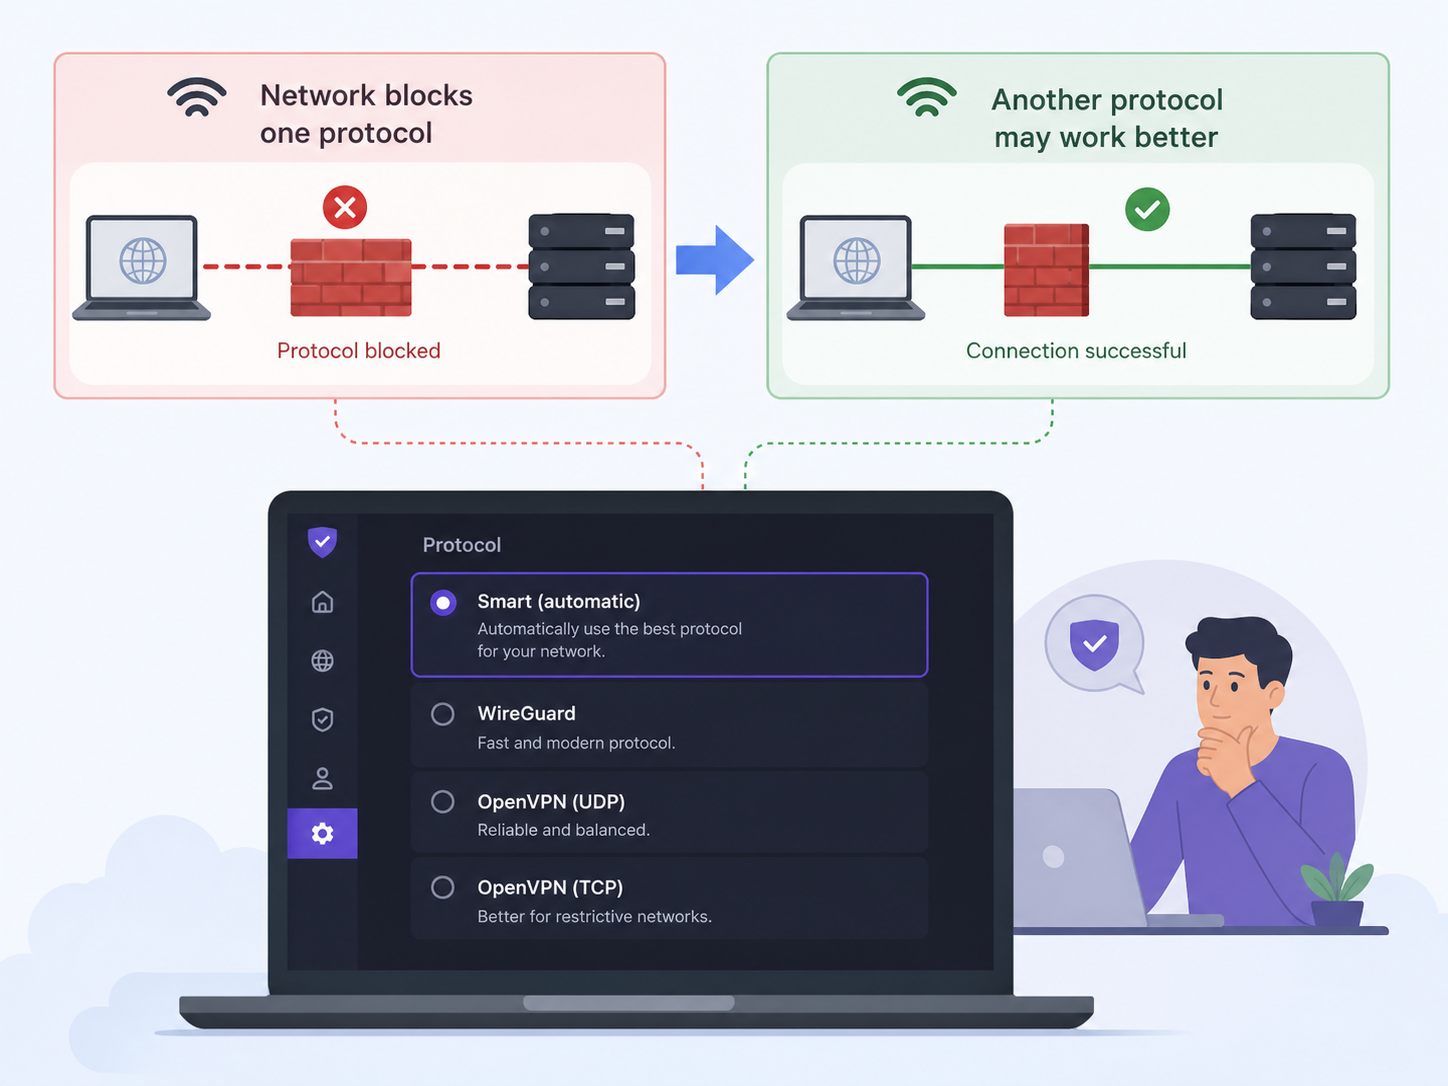
Proton VPN for Windows can use different VPN protocols depending on the app settings and network conditions. If one network blocks a protocol, another may work better. The Smart or automatic protocol option is usually the easiest starting point. If that fails, try WireGuard or OpenVPN options available in the app.
Restart in the right order
If the connection becomes stuck, disconnect Proton VPN, close the app, restart Windows, reconnect to the internet, then open Proton VPN again. This clears many temporary adapter and DNS issues without changing your account or reinstalling the app.
Check restrictive networks
Some workplaces, schools, hotels, and public Wi-Fi networks restrict VPN traffic. If you are on one of these networks, first open a browser and complete any sign-in page for the Wi-Fi network. Then try connecting again or switch to a different Proton VPN protocol.
Useful Settings After Setup
After Proton VPN is working, you can adjust a few settings based on how you use Windows. You do not need to change everything on day one, but these options are worth knowing.
- Auto-connect: helpful if you want Proton VPN to connect when the app starts.
- Kill switch: blocks internet traffic if the VPN connection drops, which helps avoid accidental exposure.
- Protocol selection: useful when a network blocks one VPN protocol or when you want to test speed.
- Notifications: useful during setup because they show connection changes and errors.
- Server selection: useful when you need a specific region or better performance.
Final Setup Checklist
A correct Proton VPN Windows setup should meet these conditions: the app is installed from Proton, you are signed in with your Proton Account, the app shows a connected VPN server, your public IP address changes after connection, and DNS checks do not show your internet provider. If all of those checks pass, Proton VPN is working as intended for normal Windows browsing and app traffic.
FAQ
How do I install Proton VPN on Windows?
Download the official Windows installer from Proton VPN, open the file, approve the Windows permission prompt, follow the installer steps, and launch the app when installation finishes.
Do I need a Proton Account to use Proton VPN on Windows?
Yes. The official Windows app requires a Proton Account login. Use your normal Proton email or username and password, not manual VPN configuration credentials.
How do I know Proton VPN is working on Windows?
The app should show connected, and your public IP address should change after you connect. A DNS check should also avoid showing your regular internet provider.
Why is Proton VPN not connecting on Windows?
Common causes include another VPN running, a blocked VPN protocol, firewall interference, unstable Wi-Fi, or a restrictive network. Try another server, switch protocol, restart Windows, and check security prompts.
Can I choose a specific Proton VPN server on Windows?
Yes. You can use Quick Connect for an automatic choice or select a country and server manually in the Proton VPN Windows app. Available locations depend on your plan.